
Easier Than It Looks Updo | Wedding Hairstyle, Wedding Guest, Prom
Wedding Hairstyle - Learn how to create a simple yet elegant updo that’s perfect for weddings, proms, or any special occasion. This easy-to-follow tutorial will help you achieve a chic, textured look with minimal effort.
BEAUTY
Easier Than It Looks Updo | Wedding Hairstyle, Wedding Guest, Prom
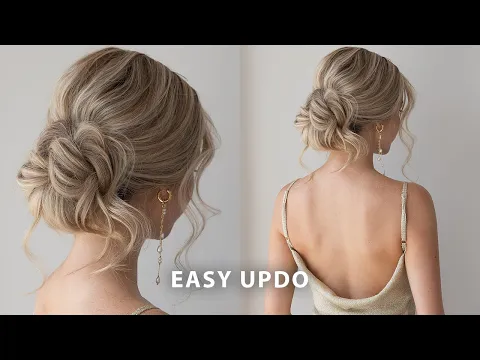
Introduction: Simple and Elegant Updo for Special Occasions
Welcome back! In today's tutorial, I'm going to share a simple yet beautiful updo that’s perfect for weddings, proms, or any special occasion. This hairstyle is easier than it looks and will leave you looking elegant and polished. Whether you're a beginner or a hairstyling pro, this updo is effortless yet stunning. Let’s dive into how to create this gorgeous look! ✨
Step 1: Prep Your Hair for Volume and Texture
To start, you’ll want to add volume and texture to your hair. Here’s how to prep:
Curling Your Hair: Use a 1-inch curling iron to curl your hair away from your face. This will add movement and body to your hair.
Tease the Crown: If you’re going for a more formal look, tease your hair lightly at the crown for extra volume. Teasing your hair helps create that full, voluminous look.
Texturizing Spray: Use a texturizing spray to add some grip and volume. This will ensure that your updo has the right texture and doesn’t feel heavy or weighed down.
Pro Tip: Teasing and texturizing spray are key for creating that effortless look that still feels full and natural.
Step 2: Section Your Hair
Now, it’s time to section your hair for the updo:
Face Sections: Begin by sectioning off the hair around your face, about 1 inch back from your hairline on both sides.
Back Section: Gather the remaining hair in the back and divide it just below your ears. This creates two sections of hair, which you will use to form the updo.
Step 3: Create the First Knot
Secure the Hair: Using a thick elastic, secure the hair at the crown of your head. For the last loop, pull the hair only partially through, leaving a small bun at the top.
Pinch and Pull: Take your time to pinch and pull small pieces of hair around your crown, creating volume and texture. The curls will give the updo movement and prevent it from looking flat.
Pro Tip: To maintain a curved shape, pull more hair in the middle than at the sides. This gives your updo a more natural, rounded look.
Step 4: Add the Lower Sections
Once your top knot is in place, it’s time to add the lower sections of hair:
Tie the Sections: Take the lower sections of hair and tie them above your first knot. Bring the left side over the right, and then pull the ends up through the knot. Tighten to secure.
Pin the Sections: Use bobby pins to secure the sections in place temporarily while you adjust the shape.
Step 5: Secure the Knot and Add Texture
Secure the Ends: Take any loose ends and tuck them under the bun, securing them with bobby pins.
Add Texture: Pinch and pull small pieces from the knots to create more texture and volume. The more you pull, the more dynamic the updo becomes.
Pro Tip: Don’t be afraid to pull small pieces of hair around the knots to add dimension. This will make your updo look more natural and less stiff.
Step 6: Frame Your Face
For a soft and romantic touch, frame your face with the front sections:
Pull Sections Back: Bring the right section of hair towards the back of your head, letting the shorter layers fall to softly frame your face.
Secure with Pins: Use a placeholder pin to secure these sections behind the top knot, adding a gentle swoop over your ear.
Step 7: Final Touches – Pins and Hairspray
Now that your updo is in place, it’s time to secure everything:
Bobby Pins: Add bobby pins throughout the knots to keep everything secure. Use a wiggle motion to slide the pins in for a more stable hold.
Hairspray: Finish the look by adding some hairspray to lock everything in place and ensure that your style lasts all day or night.
Pro Tip: Use hairspray to ensure that your updo stays intact, especially for special events like weddings or proms.
Conclusion: A Simple Yet Stunning Updo for Any Special Occasion
There you have it! This easier than it looks updo is the perfect hairstyle for weddings, proms, or any formal occasion. The best part? It’s so simple to recreate but looks incredibly elegant and polished. Whether you're a beginner or a seasoned hairstylist, you’ll love how easy it is to achieve this chic and textured updo.
Let me know which look you love the most, and be sure to share your creations with me on Instagram! ✨
Credits
Huge thanks to @Alex Gaboury for this amazing tutorial! Check out the full video here: Easier Than It Looks Updo | Wedding Hairstyle, Wedding Guest, Prom.
© Radianchy 2025. All rights reserved.
Information: